

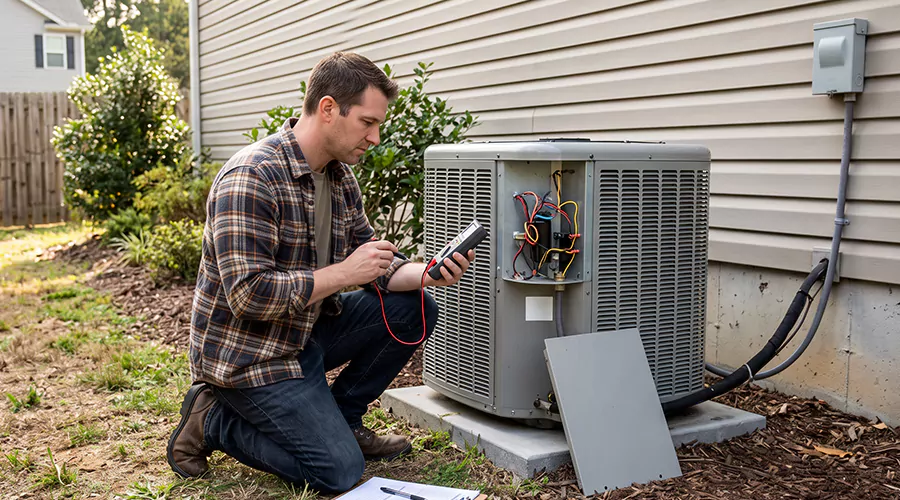
During an HVAC cleaning and inspection, a technician examines the heating and cooling system for dust buildup, airflow restrictions, moisture problems, and mechanical defects before recommending appropriate maintenance. An HVAC inspection service helps identify potential issues before cleaning begins. When cleaning is needed, the technician removes deposits from affected components using methods suited to the equipment and duct materials. The visit should end with an operational check and an explanation of any remaining problems.
An HVAC system contains multiple connected components that must operate together to heat and cool a home. These include the air filter, blower, coils, ductwork, electrical controls, and condensate drainage system. Fuel-burning heating equipment also contains combustion components that require specific safety inspections.
An inspection helps determine which components need cleaning and which may need repair. A dirty cooling coil can reduce airflow, while a damaged duct connection can allow conditioned air to escape into an attic or crawlspace. These problems require different solutions even when they produce similar symptoms inside the home.
Not every HVAC cleaning appointment includes a complete mechanical inspection, and not every inspection includes detailed duct cleaning. The contractor's service agreement should clearly state which components will be examined and which cleaning tasks are included. Understanding the normal process helps homeowners prepare for the visit and evaluate the recommendations afterward.
What Is an HVAC Cleaning and Inspection?
An HVAC cleaning and inspection combines an examination of the system's condition with appropriate cleaning and maintenance. The inspection looks for visible defects or signs of poor operation. Cleaning removes deposits that interfere with components or have been identified as contamination requiring removal.
The procedure can vary according to the equipment. A central air conditioner with an indoor air handler has different components from a gas furnace connected to an outdoor cooling unit. Some homes also contain heat pumps or separate heating and cooling systems.
The technician may inspect airflow and the condition of the filter before examining the blower and cooling coil. Drainage components should be checked when the system produces condensation during cooling. Accessible duct connections can also be evaluated for damage and air leakage.
A complete duct-cleaning project is a more specialized service than an ordinary HVAC tune-up. It normally involves additional equipment to loosen and collect debris from concealed passages. The two services can be scheduled together, but their scopes should remain clear.
What Is the Difference Between an HVAC Inspection and HVAC Cleaning?
An inspection evaluates condition and operation, while cleaning removes unwanted deposits. Some maintenance appointments include both, but the tasks have different purposes. A technician can discover a problem during inspection that cannot be resolved through cleaning alone.
For example, a clogged filter may need replacement, while a blower with substantial dust deposits may require detailed cleaning. A broken blower motor, on the other hand, requires mechanical or electrical diagnosis and repair. Cleaning the motor housing cannot restore a failed electrical component.
| Service | Main Purpose | Typical Work |
|---|---|---|
| HVAC inspection | Identify condition and problems | Examine equipment and check operation |
| Routine HVAC maintenance | Maintain normal performance | Filter checks, drainage care, and applicable cleaning |
| Coil cleaning | Remove deposits affecting heat transfer | Clean suitable evaporator or condenser surfaces |
| Blower cleaning | Remove deposits from fan components | Clean wheel and housing |
| Air duct inspection | Evaluate internal ducts | Check material, damage, and contamination |
| Professional duct cleaning | Remove internal debris | Agitation and controlled vacuum collection |
| HVAC repair | Correct defective parts | Replace or repair identified components |
A service described as a complete HVAC cleaning may still exclude internal duct cleaning. Similarly, a duct-cleaning company may not perform a combustion safety inspection on a fuel-burning furnace. The work order should identify the boundaries of each service.
What Does an HVAC Technician Inspect?
A technician normally follows an inspection process suited to the equipment and symptoms reported by the homeowner. The exact checks depend on the system type and the work purchased. A cooling maintenance visit may focus on refrigeration and drainage, while a heating inspection may include combustion safety checks.
Air Filter and Return Air Path
The filter is usually one of the first components examined because its condition affects airflow through the system. A heavily loaded filter can restrict the blower's ability to move air. Gaps around the filter frame can also allow particles to bypass the media and collect downstream.
The technician should check whether the installed filter is suitable for the equipment. A high-resistance filter may cause problems when the system was not designed for it. The return openings and accessible return connections can also be evaluated for restrictions.
Blower Motor and Fan
The blower moves conditioned air through the ducts. The technician may inspect the blower wheel for accumulated dust or physical damage and listen for unusual mechanical noises. Depending on the equipment, electrical measurements and airflow checks may be appropriate.
Deposits on the blower blades can affect their performance. However, a noisy or weak blower may have a mechanical or electrical defect unrelated to dirt. The inspection should distinguish between a cleaning need and a component needing repair.
Evaporator Coil
The indoor evaporator coil removes heat from the circulating air during cooling. Dust can collect on the fins, especially when filtration is inadequate. The technician examines the coil for deposits and conditions that interfere with airflow or heat transfer.
Repeated ice formation requires additional investigation. A dirty filter or coil can contribute to low airflow, but refrigerant-related problems may produce similar symptoms. The inspection should identify the cause rather than automatically recommend coil cleaning.
Outdoor Condenser
The outdoor unit contains components responsible for releasing heat during cooling. Leaves and debris can obstruct airflow through the condenser coil. The technician may inspect the cabinet and coil surfaces and check whether sufficient space is available around the equipment.
Cleaning can help when dirt restricts airflow, but damaged electrical or refrigeration components require separate work. Outdoor units should not be pressure-washed indiscriminately because delicate fins can bend or become damaged.
Condensate Drainage
The condensate pan and drain remove water produced by the cooling coil. The technician may look for standing water, sediment, and evidence of overflowing. A blocked drain can cause water damage around an air handler or activate a safety switch.
Cleaning the pan and clearing an appropriate obstruction may be included in maintenance. However, a damaged drain assembly or poor installation slope requires repair. The technician should confirm that the system can discharge condensate properly.
Thermostat and Controls
The thermostat and controls regulate heating and cooling operation. The technician may check whether equipment starts and stops appropriately in response to settings. Some systems also provide diagnostic information through control boards or error codes.
A thermostat reading alone does not prove the HVAC system is operating correctly. Control faults and equipment problems can produce similar comfort complaints. The inspection should consider the actual response of the heating or cooling system.
Ductwork and Registers
Accessible ductwork can be inspected for disconnected fittings, damaged insulation, and visible openings. Supply and return registers may also be checked for restrictions. A duct with a large air leak can reduce room comfort even when the heating or cooling equipment operates normally.
The technician may recommend airflow or leakage testing when physical defects are not obvious. These tests provide more useful information than assuming that every uncomfortable room has dirty ducts. Cleaning does not correct undersized or crushed ductwork.
What Happens During an HVAC Cleaning and Inspection Step by Step?
A combined HVAC cleaning and inspection usually begins with discussing symptoms and identifying the equipment. The technician then checks the system and performs the cleaning tasks included in the service. The exact sequence varies, particularly when a mechanical defect is discovered.
Step 1. Review the Homeowner's Concerns
The technician should ask whether the system has been producing weak airflow, uneven temperatures, unusual noise, or water leakage. Information about recent repairs or filter changes can also help narrow the possible cause. A clear description of the symptoms makes the inspection more focused.
Homeowners should mention whether problems occur during heating, cooling, or both. For example, weak airflow in both modes may suggest a shared air distribution issue. A problem that appears only during cooling could involve the coil or condensate system.
Step 2. Identify the Equipment and Service Scope
The technician determines which heating and cooling systems serve the property. Some homes have separate units for different floors, while others use one combined system. The model and installation arrangement influence which components need inspection.
The service agreement should specify whether the visit includes an ordinary tune-up, equipment cleaning, or internal duct cleaning. These tasks require different tools and amounts of time. Identifying the scope at the beginning prevents misunderstandings about what will be completed.
Step 3. Perform an Initial Operating Check
When safe and appropriate, the technician may observe the equipment running before shutting it down for maintenance. This can reveal abnormal noises or airflow conditions that are harder to evaluate when the system is off. Temperature and other operating measurements may be recorded.
If the equipment shows signs of a dangerous defect, the technician should not continue operating it merely to complete the test. Fuel-burning appliances with suspected combustion problems and electrical equipment showing unsafe conditions require appropriate precautions.
Step 4. Shut Down and Isolate Equipment
Before accessing internal components, the technician follows the equipment manufacturer's shutdown and electrical isolation procedures. Turning off the thermostat alone may not remove all electrical hazards. Capacitors and other parts may require specific precautions.
Equipment panels should be opened only by qualified personnel when internal service is needed. Gas connections and combustion exhaust components also require appropriate handling. The cleaning procedure must not introduce a hazard unrelated to the original maintenance task.
Step 5. Inspect and Service the Filter
The technician removes or checks the air filter through its designated access. The condition of the media and its fit are examined. A filter with significant dust loading may need replacement, while a reusable filter may be cleaned according to its manufacturer's instructions.
The filter should have the correct airflow characteristics for the system. Installing an unsuitable filter can increase resistance even when it is new. The technician should explain why a replacement is recommended rather than automatically charge for a more expensive filter.
Step 6. Inspect the Blower Assembly
The blower wheel and housing may be examined for accumulated deposits. Thick dust on the wheel can affect airflow, while loose components or worn mechanical parts may create abnormal vibration. The findings determine whether cleaning or repair is appropriate.
Detailed blower cleaning may require removal of the assembly. This is more involved than wiping the cabinet interior and may not be included in a basic tune-up. The technician should explain the extra work before disassembling components beyond the agreed scope.
Step 7. Examine and Clean the Cooling Coil
The indoor cooling coil is inspected for deposits and signs of freezing or damage. Cleaning is performed when necessary using methods suited to the coil material. A gentle brush or approved coil-cleaning product may be used depending on the manufacturer's instructions.
Cleaning must protect the coil fins, electrical components, and internal insulation. Strong water pressure or unsuitable chemicals can damage the equipment. When the coil has a problem unrelated to dirt, that defect should be evaluated separately.
Step 8. Inspect the Condensate Pan and Drain
The technician examines the drain pan for sediment and checks whether water can flow toward the outlet. A blocked line can cause overflow or an equipment shutdown. When appropriate, the drain may be cleared using a method compatible with its configuration.
A recurring water problem deserves more than surface cleaning. The technician should investigate damaged piping or improper drainage conditions. Moisture reaching surrounding insulation can create additional repair work if not addressed promptly.
Step 9. Inspect the Outdoor Unit
For air conditioning and heat pump systems, the technician may examine the outdoor condenser coil and surrounding cabinet. Leaves or debris restricting airflow can be removed using suitable methods. The unit should remain disconnected from electrical power during cleaning as required by the service procedure.
The technician may also check the condition of accessible electrical and mechanical components. A damaged fan or suspected refrigerant issue is not resolved by washing the condenser. The work should distinguish cleaning from diagnosis and repair.
Step 10. Inspect Accessible Air Ducts
Accessible supply and return ducts may be examined for loose joints or damaged materials. A technician can check whether flexible ductwork is crushed or sharply bent. Insulation and register boots may also show evidence of moisture or physical damage.
An inspection may identify a need for duct repair rather than cleaning. A disconnected branch should be reattached, while a severely crushed flexible section may require replacement. The technician should document the condition before recommending the work.
Step 11. Perform Internal Duct Cleaning When Included
If professional duct cleaning is part of the service and inspection findings support it, the contractor uses appropriate source-removal equipment. Suitable brushes or air agitation tools loosen deposits while vacuum collection captures debris. The work should protect the occupied rooms from dust released during cleaning.
The method depends on the duct material. Thin flexible liners and internally insulated ducts require more careful treatment than rigid sheet metal. Any temporary access openings should be closed and sealed after cleaning.
The National Air Duct Cleaners Association's 2025 ACR standard addresses inspection and cleaning procedures, containment, and cleanliness verification. A professional cleaning provider should be able to describe how the chosen method meets the project's agreed requirements.
Step 12. Reassemble the Equipment
After completing the cleaning and inspection, the technician restores panels and any components removed for service. The filter should be installed correctly, and duct access openings should remain secure. Tools and cleaning materials must be removed from equipment cabinets.
A poorly fitted panel or loose duct connection can create problems after an otherwise useful service. Checking the work area before restarting the equipment helps identify these issues. The system should be fully restored to its intended configuration.
Step 13. Check Normal Operation
The technician returns the equipment to service using the appropriate startup procedure. Blower operation, heating or cooling response, and drainage may be checked. Any changes in operating measurements can be compared with the initial condition.
If the equipment continues showing abnormal symptoms, further diagnosis may be necessary. Cleaning does not replace a failed capacitor or repair a refrigerant leak. Remaining concerns should be documented clearly.
Step 14. Explain the Findings
The appointment should conclude with an explanation of what was inspected, cleaned, and tested. The technician may provide photographs of significant deposits or damaged parts. Recommendations should distinguish urgent safety concerns from optional maintenance.
A written report can help homeowners understand whether additional work is necessary. It should identify any components that were not inspected because access was unavailable. This information is useful for future service visits.
What Happens During an Air Duct Inspection?
An air duct inspection focuses on the condition of the air distribution network rather than the heating or cooling equipment alone. It may involve examining supply and return trunks and their connections. A camera can sometimes help identify concealed damage or substantial debris.
The inspector should determine whether the ducts contain ordinary dust or a condition that requires cleaning or repair. Loose joints and collapsed flexible branches should also be documented. These defects can affect airflow even when the duct surfaces are relatively clean.
Airflow testing and leakage testing may be appropriate when comfort problems remain unexplained. A camera inspection identifies visible conditions, while pressure and airflow measurements evaluate how the system performs. Neither method replaces the other in every situation.
Cleaning should follow the inspection findings. A sound duct with light ordinary dust may not require professional source removal, while significant construction debris or a documented infestation may justify it.
What Are the Most Common Problems Found During an HVAC Inspection?
HVAC inspections can identify conditions affecting airflow, cooling performance, and equipment safety. Some require only maintenance, while others need mechanical repair. The technician should explain how each finding affects the system.
| Inspection Finding | Possible Effect | Typical Response |
|---|---|---|
| Dirty filter | Restricted airflow | Replace or clean approved filter |
| Dusty evaporator coil | Reduced airflow or heat transfer | Appropriate coil cleaning |
| Dirty blower wheel | Reduced blower performance | Clean affected component |
| Blocked condensate drain | Water overflow or shutdown | Clear and repair drainage |
| Loose duct connection | Air leakage | Reattach and seal |
| Crushed flexible duct | Restricted room airflow | Replace or correct damaged section |
| Damaged duct insulation | Heat loss or condensation | Repair or replace insulation |
| Electrical component defect | Unreliable operation | Qualified repair |
| Combustion safety problem | Potential hazardous exhaust conditions | Qualified safety service |
| Excessive debris inside ducts | Possible contamination or blockage | Evaluate appropriate cleaning |
The same symptom may have several causes. Weak cooling, for example, can result from a dirty filter or problems elsewhere in the system. An inspection is valuable because it helps identify the actual component needing attention.
How Long Does an HVAC Cleaning and Inspection Take?
A routine HVAC inspection or maintenance visit may take approximately one to two hours, depending on the equipment and work included. Detailed coil or blower cleaning can extend the appointment. A full professional duct cleaning project generally requires substantially more time.
For many residential systems, whole-house duct cleaning can take several hours. The number of branches and accessibility influence the duration. If equipment repairs or specialized contamination work are necessary, a separate appointment may be required.
Homeowners should not judge quality solely by how quickly a technician completes the visit. A short inspection may be suitable for straightforward equipment, while a complicated system requires more detailed attention. The work completed should match the quoted service.
How Much Does an HVAC Cleaning and Inspection Cost?
HVAC cleaning and inspection costs vary because contractors include different services. A basic AC tune-up may cost approximately $70 to $200, while broader HVAC maintenance commonly ranges from $175 to $350. Professional air duct cleaning is usually priced separately.
Published 2026 U.S. estimates place many residential air duct cleaning projects between $271 and $509. More involved whole-house cleaning may cost more. These figures should not be added together automatically because some contractors provide combined packages.
The estimate should distinguish the initial inspection from detailed component cleaning. For example, inspecting a coil and cleaning it in place involve different amounts of work. A contractor should obtain approval before performing services beyond the agreed scope.
Does an HVAC Inspection Include Indoor Air Quality Testing?
Ordinary HVAC inspection does not automatically include indoor air quality testing. The technician may identify conditions associated with moisture or contaminated components, but this is different from measuring airborne pollutants. Specialized testing may be needed when a specific environmental concern warrants it.
A dark deposit near a vent does not confirm mold contamination. Similarly, the presence of ordinary household dust is not evidence of a particular medical risk. Any recommendation for testing should explain what question the test is intended to answer.
For fuel-burning appliances, carbon monoxide safety is a separate concern from ordinary dust contamination. Qualified furnace maintenance may involve combustion and venting checks. Household carbon monoxide alarms should also be installed and maintained according to applicable guidance.
How Often Should You Schedule HVAC Cleaning and Inspection?
Many HVAC equipment manufacturers recommend professional maintenance approximately once a year. Some homeowners schedule cooling-system service before summer and heating-system service before winter. The appropriate schedule depends on the equipment type and manufacturer.
Filters usually require more frequent attention. ENERGY STAR recommends checking central heating and cooling filters monthly during regular use. Replace or clean them as required by their condition and the equipment instructions.
Internal duct cleaning does not follow the same schedule. The Environmental Protection Agency recommends cleaning residential ducts when specific conditions justify the work. An annual HVAC inspection should not automatically become an annual whole-house duct cleaning.
How Should You Prepare for an HVAC Cleaning Appointment?
Preparation helps technicians access the equipment and understand the symptoms. Identify where the indoor and outdoor units are located and remove ordinary obstacles from designated service areas. Do not dismantle equipment or move heavy appliances before the visit.
Have recent repair records available when possible. Information about filter replacements and recurring drainage problems may help the technician focus the inspection. Make a note of rooms with weak airflow or unusual temperatures.
Ask the company to confirm the services included before the appointment begins. If duct cleaning is part of the work, clarify whether supply and return ducts and applicable equipment components are covered. This helps avoid unexpected charges.
What Mistakes Should You Avoid During HVAC Cleaning?
Improper cleaning can damage equipment or leave important defects unresolved. The most common problem is assuming that every airflow complaint can be corrected through dust removal. A damaged component needs diagnosis and repair rather than repeated cleaning.
Avoid these mistakes:
- Allowing internal electrical work without proper isolation.
- Using pressure washing on delicate cooling coils.
- Applying unapproved chemicals inside HVAC ducts.
- Disturbing suspected asbestos-containing insulation.
- Brushing damaged flexible duct liners aggressively.
- Ignoring a blocked condensate drain.
- Treating a disconnected duct as a cleaning problem.
- Restarting equipment before panels are restored.
- Paying for mold treatment without documented findings.
- Assuming a basic tune-up includes full duct cleaning.
The technician should also protect the system's filtration and airflow path. Cleaning can provide useful maintenance, but it should not create new leaks or restrictions. Inspection and verification help confirm that the equipment remains suitable for normal use.
When Should You Call a Professional?
Professional HVAC inspection is appropriate when cooling or heating performance changes without an obvious cause. Repeated system shutdowns and condensate leakage also deserve qualified attention. Internal electrical work, refrigerant service, and combustion safety inspections should be handled by appropriately trained technicians.
Significant suspected contamination inside ductwork requires a separate assessment. The contractor should determine whether cleaning or replacement of damaged materials is needed. A moisture source or pest entry point must be corrected to prevent recurrence.
An experienced technician should be able to explain what was found and why the recommended service is appropriate. Photographs and measurements can help support the diagnosis. Homeowners should receive a clear estimate before approving additional repairs.
How Can You Maintain Your HVAC System Between Inspections?
Regular filter maintenance is one of the simplest ways to protect the equipment. Check the filter according to the manufacturer's schedule and confirm that it fits correctly. Keep supply and return openings free from furniture and other obstructions.
Outdoor equipment should remain clear of leaves and storage that restrict airflow. Avoid spraying water into electrical compartments or attempting internal coil cleaning without suitable instructions. Check the area around the indoor unit periodically for unexpected moisture.
Report unusual noises, repeated freezing, and water leakage promptly. These symptoms can become more expensive when left unresolved. A maintenance record also helps the technician compare system performance from one visit to the next.
Conclusion
An HVAC cleaning and inspection begins with evaluating system operation and identifying components that need attention. The technician may check filters, blowers, coils, drainage, duct connections, and applicable safety components before performing appropriate cleaning. Full duct cleaning is a separate service unless it is specifically included in the work order. The visit should end with operational checks and a clear explanation of the findings. Before scheduling, confirm the inspection scope and prepare a list of the symptoms you want evaluated.